Category: Azure

  • Upgrading and Migrating Sitecore

    Welcome to the first installment of this series, where I share key insights gained from migrating Sitecore across versions. Whether transitioning from on-premises to Azure, migrating workloads from AWS to Azure, or navigating complex upgrades, this series is designed to equip Sitecore customers with the knowledge and strategies needed for seamless execution.

    Throughout this guide, we’ll explore critical considerations, feature priorities, and best practices for ensuring a smooth transition between environments. Stay tuned for expert insights that will help you optimize your Sitecore upgrade journey.

    Overview of Sitecore 10.0: There are lot of Blogs to detail this aspects. I would like to indicate that Sitecore has been very good with the Change Logs so you can keep watching and reading more from time to time from the real source.

    Why Upgrade? 

    Upgrading to latest versions of Sitecore is not just a recommendation; it’s a strategic necessity. With Sitecore having declared end-of-support for lower versions, continuing to use outdated versions can expose your organization to security vulnerabilities and lack of technical support. Customers have reported increasing difficulties in managing and maintaining integrations with third-party products, which can hinder operational efficiency and innovation.

    Moreover, the build and development paradigm has evolved significantly. Sitecore introduces modern development practices and tools that streamline workflows, enhance performance, and improve scalability. By upgrading, you ensure that your platform remains robust, secure, and capable of leveraging the latest features and integrations, ultimately providing a better experience for both your team and your end-users.

    One other way is to avoid code bloat, and also prepare to Move towards PaaS and SaaS from IaaS and or on-premises.

    Preparation Steps: Before starting the upgrade, it’s essential to:

    1. Assess Current Environment: Understand your current setup and identify any customizations or integrations.
    2. Backup Data: Ensure all data is backed up to prevent any loss during the upgrade.
    3. Review Documentation: Familiarize yourself with the official Sitecore upgrade documentation and guidelines.

    Initial Setup: Begin the upgrade process by:

    1. Setting Up a Test Environment: Create a staging environment to test the upgrade without affecting the live site.
    2. Running Compatibility Checks: Ensure all modules and customizations are compatible with Sitecore, Sitecore Forms, Custom Components, Compatibility with SXA Modules are few of them to note.
    3. Planning Downtime: Schedule the upgrade during a period of low traffic to minimize disruption.

    Conclusion: Upgrading Sitecore is a strategic move that requires careful planning and execution. In the next post, we’ll dive into the detailed steps for upgrading to Sitecore 10.4, addressing common challenges and providing solutions.

    Stay Tuned: Follow along as we guide you through each step of the upgrade process, ensuring a smooth transition and optimal performance.
  • Azure AD and Sitecore Users

    Sitecore introduced Sitecore Identity (SI) since version 9.1. This is a mechanism to log in to Sitecore. It provides a separate identity provider, and SSO (Single Sign-On) can be configured. This made the Sitecore instance architecture very scalable.

    This concept is primarily an interaction between the Sitecore Identity Server and Sitecore Identity Clients.

    Sitecore Identity Server

    An OpenID Connect-compliant security Service. The deployment of any instance now has this server as an isolated instance living in the same Resource Group as configured. The URL is of the pattern https:://{instanceName}.{identityserver}. Sitecore Identity Server only works with HTTPS protocol.

    Sitecore Identity Clients

    A client is an application that authenticates users who are using the SI server. Each client must be registered with the SI Server before it can be used. The SI client requests security tokens, validate them, and create context users from these tokens. It can also bearer tokens to make authorized request to other services that are configured to accept tokens.

    One of the examples could be Web Applications, Mobile or Desktop Apps connecting to the server. In this case the client is the Sitecore Instance itself. The Content Management Node can be used as an example.

    Configure Azure AD

    Register an Application, add to approved application in the Azure Active Directory Instance. We need the following handy before we configure the Identity Server.

    Add the redirect URL to the Identity server URI. And also the suffix “/signin-oidc”

    You need to enable ID Tokens to be passed between AD and Sitecore Identity Server. In the Application under Authentication enable “ID tokens”

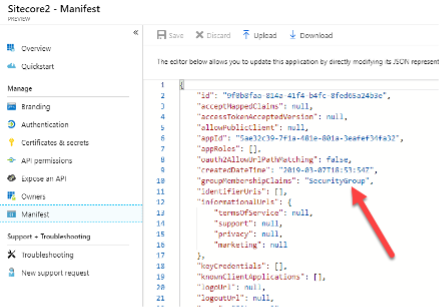
    Make changes to the Manifest.

    Copy the following for use from the Overview of the Application

    • Application (Client) ID:
    • Directory (tenant) ID:
    Example Manifest

    Configure Sitecore Identity

    In the current instance, open the App Service with the Azure provided editor (in preview). Or establish FTP and navigate to the “/Sitecore/Sitecore.Plugin.IdentityProvider.AzureAd.xml” file and make the following changes:

    • Under Settings:Sitecore:ExternalIdentityProviders:IdentityProviders:AzureAd, change the Enabled node to true.
    • In the ClientId and TenantId nodes, you’ll paste the GUIDs copied from the Azure AD Application you just created.

    User Transformation

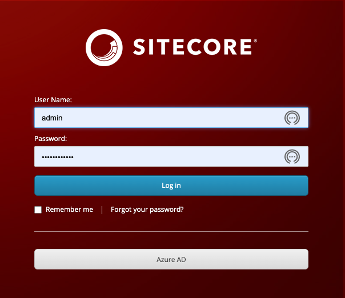
    Identity server typically do not recognize external accounts, when the Azure AD Credentials are passed by clicking on the Azure AD Button seen below (created in our earlier steps) the role/permissions are not set automatically. This could cause failure to authenticate.

    Azure AD Login Enabled

    To resolve that we need to create a group in Azure AD to use the Object ID of that user group and update the configuration in the Identity Server config file to setup a transformation.

    Azure Group Setup

    For this POC if you can create a temporary AD Group that is useful or use an existing Group, this is totally your choice base on the Security Governance Policies you have within your organization.

    Transformation Setup

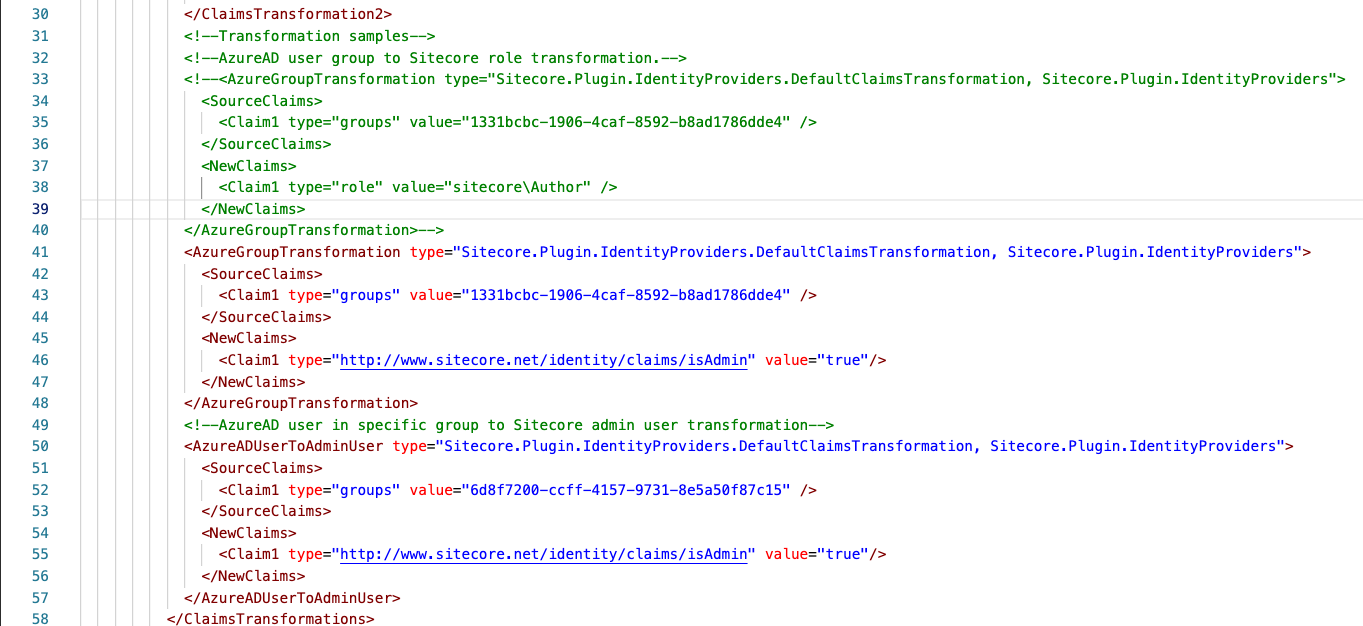
    A sample code is present in the “\sitecore\Config\Sitecore.Plugin.identityProvider.AzureAd.xml” a sample is below

    • Uncomment the xml block below as shown below
    • Replace the guid with the group ID in line 35

    For a sample xml please refer to the GitHubGist

    Claims Setup

    In the above step with the changes to the GUID for groups we have a claim setup as a Sitecore Author see the line 38 in the image provided above.

    Similar to this we can create multiple claims and map each Group in Azure AD to a Role in Sitecore. We can have different type of Roles with various levels of permissions and restriction on each content Item to be very granular or site/tenant for that matter.

    Important configuration

    The custom user builder config needs to have the resolve=”true” as the code snippet below

    <externalUserBuilder type="My.Foundation.Custom.AzureAD.CustomExternalUserBuilder, My.Foundation.Custom.AzureAD" 
        resolve="true">
       <IsPersistentUser>true</IsPersistentUser>
    </externalUserBuilder>

    Review and Test the Login

    Once the above configurations are setup, restart the App Service for the Identity Server and navigate to your Identity server URL.

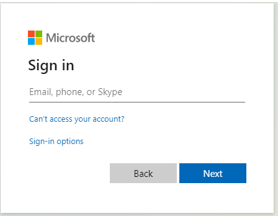
    Click on the Azure AD button and a typical login screen should appear, once you have logged in successfully the user should land on the Sitecore dashboard.

    For convenience go to the CM server making sure you are not logged in, this will navigate you to the Identity Server URL, click on Azure AD button this will navigate back to your classic MS Login screen. On successfully authenticated the user will land on the CM Server.

    Best Practices

    Typically in any organization there are many users, not all users will end up using Sitecore. The best practice is to allow users with respective permissions by adding them to the respective Groups in AD, have a mapping Role in Sitecore and a Sitecore Admin can move them to an appropriate role. There could be a Blanket Role created in Sitecore so all the newly created users will fall into that group initially. Subsequently a User Admin can assign them the required Role(s).

    Other detailed References

    1. External User Builder

  • Sitecore 10 Developer Certification

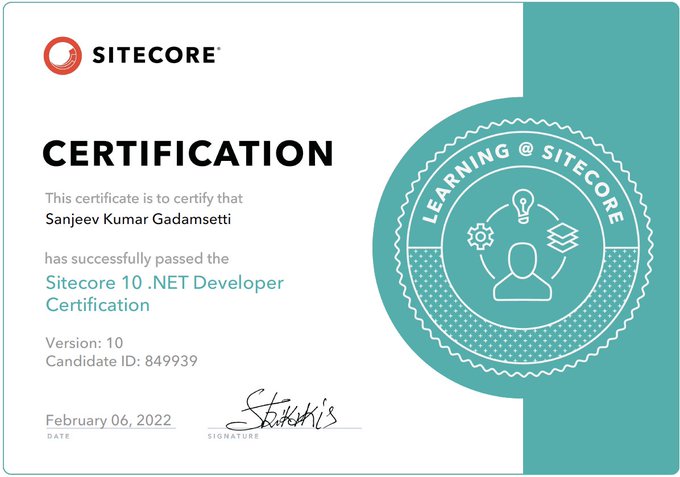
    Sitecore 10 Developer Certification

    This Certification has been a standard requirement for all of us who are active in Sitecore.

    I would like to share few important insights about the Certification and what is important that you need to prepare.

    First and foremost thing is to have enough practice on the product, then you need to read the latest developments.

    Sitecore has been improving the platform its integrations with the parallel technologies and keep it powerful on every iterations. so each one of us should strive to keep updating their technical skills

    What is covered in this certification is very clear, you can read them in the learning requirements for the Certification, at learning.sitecore.com.

    Make a note of the competencies requires listed and explained in the study guide section.

    There are few things which I am listing below to take keen note on

    1. Sitecore has introduced and delivered a great developer tool Sitecore CLI so remember what are the advantages of using it one part, but what if you are trying to do a task and that is not working as expected and how will you fix it. Yes the plugin.
    2. Sitecore has a come a long way in helping deployment of content from environment to environment, however to the developer workflow one cannot forget the best part of serialization, so Content Serialization is a better needed tool for us developers. Pay attention to what are the important configuration files, what if you do not do some important steps and the expected items did not end up in the right environment.
      • How the modules and its dependencies work together
      • which files (configuration) needs to be done right
      • where is the setting for dependencies
      • how do the rules work
    3. During the first steps all of us will do an installation, we would not work without it. With SIF there were great learnings, however the cool GUI Installation tool always had those challenges, so remember those errors which can cause the situation. Don’t drop your learnings what happens if you don’t configure Solr right and still get your self ahead, this tool is going to stop you, right! read the error properly and you will understand the reasons well.
    4. SXA all of us would expect that this will be the topic, I agree people said there is NO SXA in the exam. It is non-sxa. in order to answer questions which starts with “in a non-sxa site”… you need to know what is done in SXA and non-SXA too. The answers will help you to remove two obvious non related answers then the rest will guide you to answer. Don’t get trapped in loops just your experience is the answer.
    5. “Back” button is your friend, one question which will confuse you or challenges your memory will connect and click in the next question. So get back and fix it.
    6. The basics of Placeholders and Placeholder Settings are no exceptions,
      • what happens if you don’t have the settings right
      • why would both the components content is visible while you place them on a layout
      • importance of dynamic placeholders
    7. Another basics is Rendering parameters, they will always be your friend so, what would you recommend to get this situation corrected when you a developer repeats sitting in the same project but in different rooms (silos), yes best practices angle is the right stuff for all your questions.
    8. Docker has been our friend since many years, this is mainstream for non-developers too. The basics of environment files and their significance is very cool foundation items. Don’t miss them these are easy common items
    9. If you wear your Best Practices hat, you will be looking at serious flaws in design and approach, why would this template inherit from that one vs why would you keep the fields organized when defining the order. These are basics often goes without saying.
    10. Read the study guide you will get few practice questions, this will provide an idea of how the questions are framed. They will be showing you the answer in plain sight and try to mislead you at the same time.

    Practice more and be confident, this will help you to get the high scores.

    References

    1. All details from booking the exam to planning is well documented in Bala’s Sitecore 10 Certification tips and Tricks
  • Sitecore 10.2 Deploy on Azure using SAT 2.7

    In this blog I want to explain the path I have taken, (agreed the latest and greatest in terms of SiteCore version) should not be used for Production purposes for all good reasons. However trying the latest in releases gives the kicks of being on on the Edge.

    So I will be using SAT 2.7 and Sitecore 10.2.0 for this discussion.

    Referring to topologies, as we all know Sitecore supports a range of Topologies from XP0, XM, XMSingle, read here for more.

    Certificates are very important entities, a great care to be taken while creating/generating them. The major lessons learnt during this process of deploying an Sitecore 10.2 XM0 is amazing.

    Lessons learnt (common mistakes)

    • Syntax: there has to be ” double quotes before and after when we define/set a attribute in JSON, commas “,” wherever necessary
      $CertificateFile = ASDFE$T$%EADACDRERCC.pfx
      $CertificateFile = “ASDFESDF#$#EACDED_)#(.pfx”
    • Having few files in the local where you are executing the powershell command and the rest in Azure Blob Storage is not advised. Use the Azure Storage Account Container for your files and get the SAS token/URL and use them for the Parameters
    • DeploymentID names should be unique
    • DeploymentID in the Parameter for Start-SitecoreAzureDeployment -Name
      is different from the "params":{ "deploymentId":{"value":"someid"},
    • RAW version

    There are few important steps one have to follow to make this a breeze. Sitecore has provided a complete Walkthrough and the prerequisites so I was in the thick of it to completely understand and share my experience in the process.

    However when you are trying the latest and greatest there are chances you can get to the end and still not complete. That is where I am at. Though I maintain to do the right thing as follows this is not working

    • Different names for DeploymentId and “deploymentId”
    • Have all the SCWDP uploaded to Azure Storage account and get the SAS URL (have these URLs to last longer)
    • Have full permissions on the Azure Subscription